Notebook Outputs
The outputs tab of your notebook configuration allows you to save files from your notebook execution to your Application Files.

Using Notebook Outputs
Every notebook execution will result in a set of autogenerated files as well as any custom output files that your notebook creates. You can save any autogenerated or custom file to your Application Files. If your notebook creates CSV files, you can then choose to save them to a data table.
File Names
Every non-autogenerated output file requires a File or Directory Name, which is the name of the file or directory as it was written to your Jupyter notebook's OUTPUT_DIR environment variable. These names ...
- May only contain uppercase letters, lowercase letters, numbers, periods (.), underscores (_) or hyphens (-)
- Should (but are not required to) match the file extension of the input
This field may also be templated from one of the following:
- {{ctx.<variableName>}}: A custom context object
- {{globals.<variableName>}}: Your Application Globals
Generating Output Files
Each file should be written to the directory defined by the OUTPUT_DIR environment variable.
For example, to create a CSV file called myData.csv from a data set and a chart image file called myChart.png and save them to your OUTPUT_DIR, your Python code would resemble the following:
import os

# Code that generates files goes here ...

myData.to_csv(os.path.join(os.environ['OUTPUT_DIR'], 'myData.csv'))
myChart.get_figure().savefig(os.path.join(os.environ['OUTPUT_DIR'], 'myChart.png'))
You may view a Python code example by clicking the "View Code Example" link at the top of the Notebook Outputs page.

Configuring Notebook Outputs
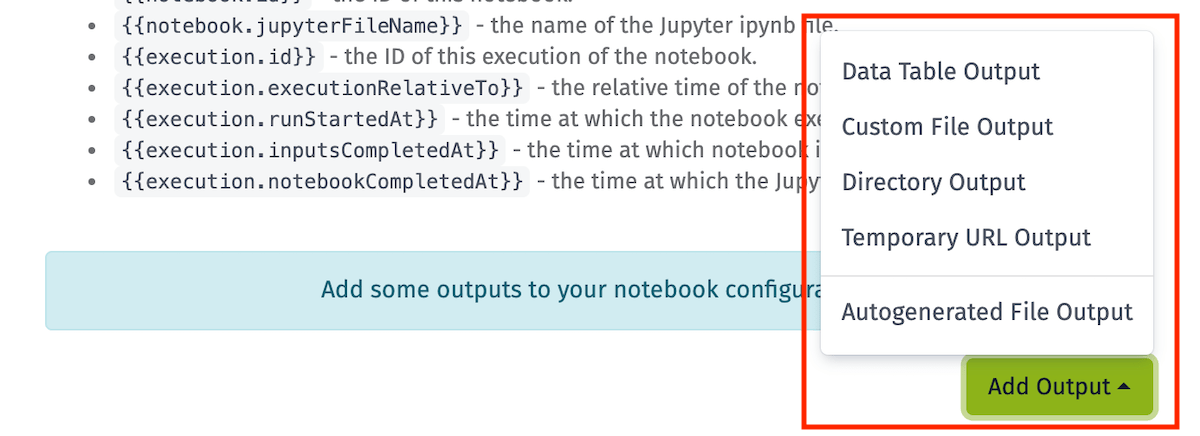
To add an output to your notebook, click the "Add Output" dropdown and choose the type of output you would like to add. There are many different types of outputs you can configure in your notebook ...

Data Table
Data Table outputs allow you to save a custom CSV file that is generated by your notebook to a Data Table. A CSV file must be saved into the directory specified by the OUTPUT_DIR environment variable.
If your Data Table has pre-existing columns, the first row of your CSV data must contain headers that correspond to the column names in your Data Table. By importing your notebook results to a Data Table, they can be used in the Custom Chart Block in a dashboard or in an Experience.
Selecting A Data Table Output
First, configure which CSV file to save to your Application Files by entering the name of the file as it is saved to your designated OUTPUT_DIR.

Selecting A Data Table
After specifying which CSV output file to save, select a Data Table from your application to import the data into.
Creating Additional Columns
Then, select whether any additional columns from your output should have corresponding columns created within your selected data table, or if the columns should be ignored.

Appending/Overwriting Rows
Then, select whether the file's contents should be appended to the selected data table, or if it should overwrite the data table's existing rows.

Custom File
Custom File outputs allow you to save any custom file created by your notebook into your Application Files. This file must be created by your notebook and saved into the directory specified by the OUTPUT_DIR environment variable in order to be saved.
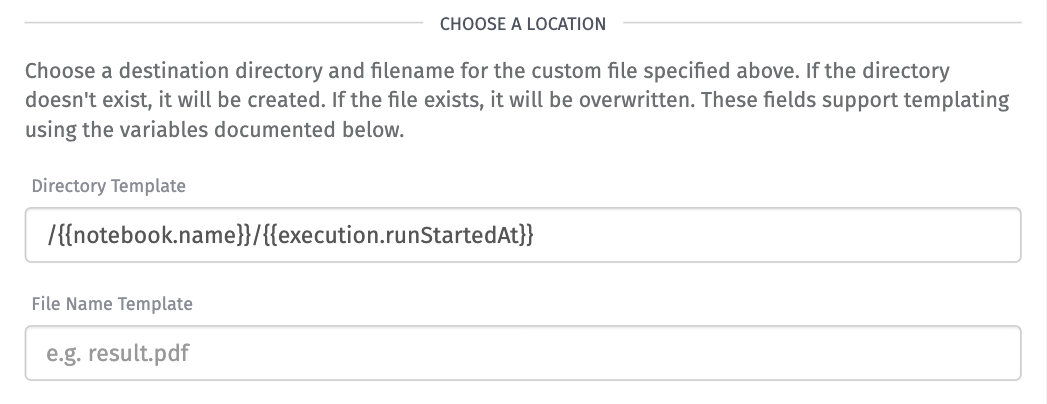
The inputs for configuring location directories and file names support templates.

Configuring File Locations
In order for a custom file to be saved to your Application Files, you must also designate a directory inside of your application for the output to be saved too as well as the file name that the output will be saved as.

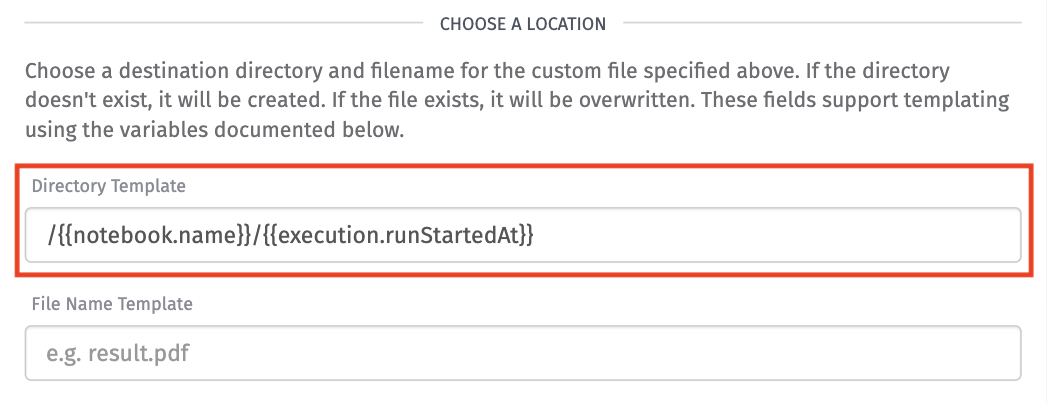
Configuring File Directory Templates
This is the directory pathname where your output will be saved in your Application Files. If the directory that you enter doesn't already exist, a new directory will be created. The default value of the template will place your file inside a directory with the name of your notebook and then inside of a sub-directory of the time when the execution started.

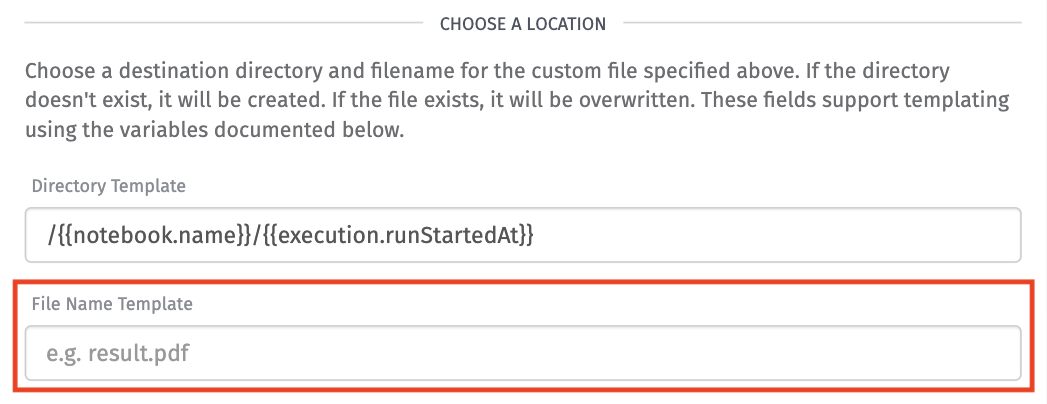
Configuring File Name Templates
This is the name of the file as it will be saved in your Application Files. If a file of the same name doesn't already exist in your Application Files than a new file will be created. Otherwise, the existing file will be overwritten by the file from the latest notebook execution. You can template the file name using select variables as documented below.

Directory of Files
Directory outputs allow you to save multiple files from a directory created by your notebook into your Application's Files. This directory must be created by your notebook and saved into the directory specified by the OUTPUT_DIR environment variable.
The input for configuring location directories supports templating.

Configuring Directory Locations
In order for a directory of files to be saved to your Application Files, you must also designate a directory inside of your application for the files to be saved too.

Configuring Directory Templates
This is the directory pathname where your output will be saved in your Application Files. If the directory that you enter doesn't already exist, a new directory will be created.
The default value of the template will place your file inside a directory with the name of your notebook and then inside of a sub-directory of the time when the execution started.
Note: If the directory contains subdirectories they will also be created at this location along with the files contained within the subdirectories.

Temporary URL
Temporary URL outputs do not create or modify any resources in your Application Files. Instead, the output creates a short-lived URL that you may share or stream directly into other storage services such as the AWS S3: Put Node's file URL option.

Autogenerated File
Losant will automatically generate a set of files for every notebook execution that can be saved to your Application Files. These files include:
- result.html: The resulting Jupyter notebook after execution converted into an HTML file.
- result.pdf: The resulting Jupyter notebook after execution converted into a PDF report.
- result.ipynb: The resulting Jupyter notebook after execution.
- result.log: A text file of any log output from Jupyter during the notebook execution.
- result.error.log: A text file of any error log output from Losant during the notebook execution.
You may select one of these options by using the output file name dropdown.
Configuring location templates here behaves the same way as it does for configuring locations in the Custom File output type.
Templating
Templates are supported to dynamically construct directory and file names. The following variables are available:
- {{ctx.<variableName>}}: A custom context object
- {{globals.<variableName>}}: Your Application Globals
- {{notebook.name}}: the name of this notebook.
- {{notebook.id}}: the ID of this notebook.
- {{notebook.jupyterFileName}}: the name of the Jupyter ipynb file.
- {{execution.id}}: the id of this execution of the notebook.
- {{execution.executionRelativeTo}}: the relative time of the notebook execution.
- {{execution.runStartedAt}}: the time at which the notebook execution started.
- {{execution.inputsCompletedAt}}: the time at which notebook input processing was completed.
- {{execution.notebookCompletedAt}}: the time at which the Jupyter notebook finished.
Was this page helpful?
Still looking for help? You can also search the Losant Forums or submit your question there.