User Accounts
Users are the highest-level resource in Losant. All applications and dashboards are either owned by a user or by an Organization (of which users can be members). To acquire a user account, simply sign up through our web interface.
Experience Users
Losant Users are users of the Losant Platform itself, but Losant does contain another type of user: Experience Users. Since Experiences allow you to develop and publish completely custom APIs and user interfaces with built-in user management and authentication, each Experience has its own set of Users, Groups, and Domains.
Multi-Factor Authentication
Multi-factor authentication (MFA) is an extra layer of security that can be applied to an account. While not required, Losant strongly recommends enabling MFA on your account.
With MFA enabled, you (or a potential attacker) must have physical access to your mobile device in order to sign in to your Losant account. This means your account can be protected against unauthorized access even in the event your password has been compromised.
Authenticator Apps
To use Losant’s multi-factor authentication, you must have a mobile/desktop application that supports the open TOTP standard. Here are some recommended options:
Enabling Multi-Factor Authentication
To enable multi-factor authentication:
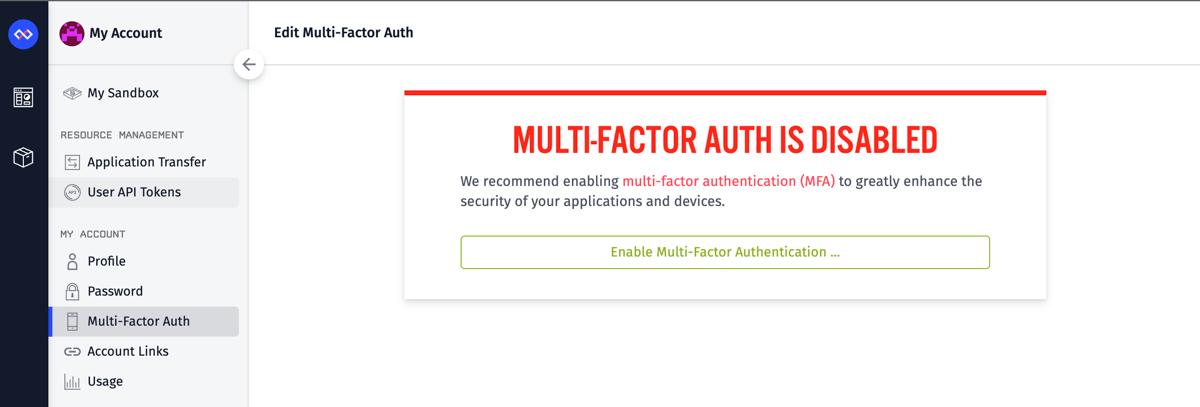
- Navigate to the “Multi-Factor Auth” link within your account sub-navigation.
- Select “Enable Multi-Factor Authentication …“.
- Use an Authenticator app to scan the QR code. The app will then begin to generate short-lived, one-time use codes.
- Type the code displayed within your Authenticator app into the “Multi-Factor Code” field in your Losant account settings.
- Enter your Losant password and click “Enable Multi-Factor Auth.”
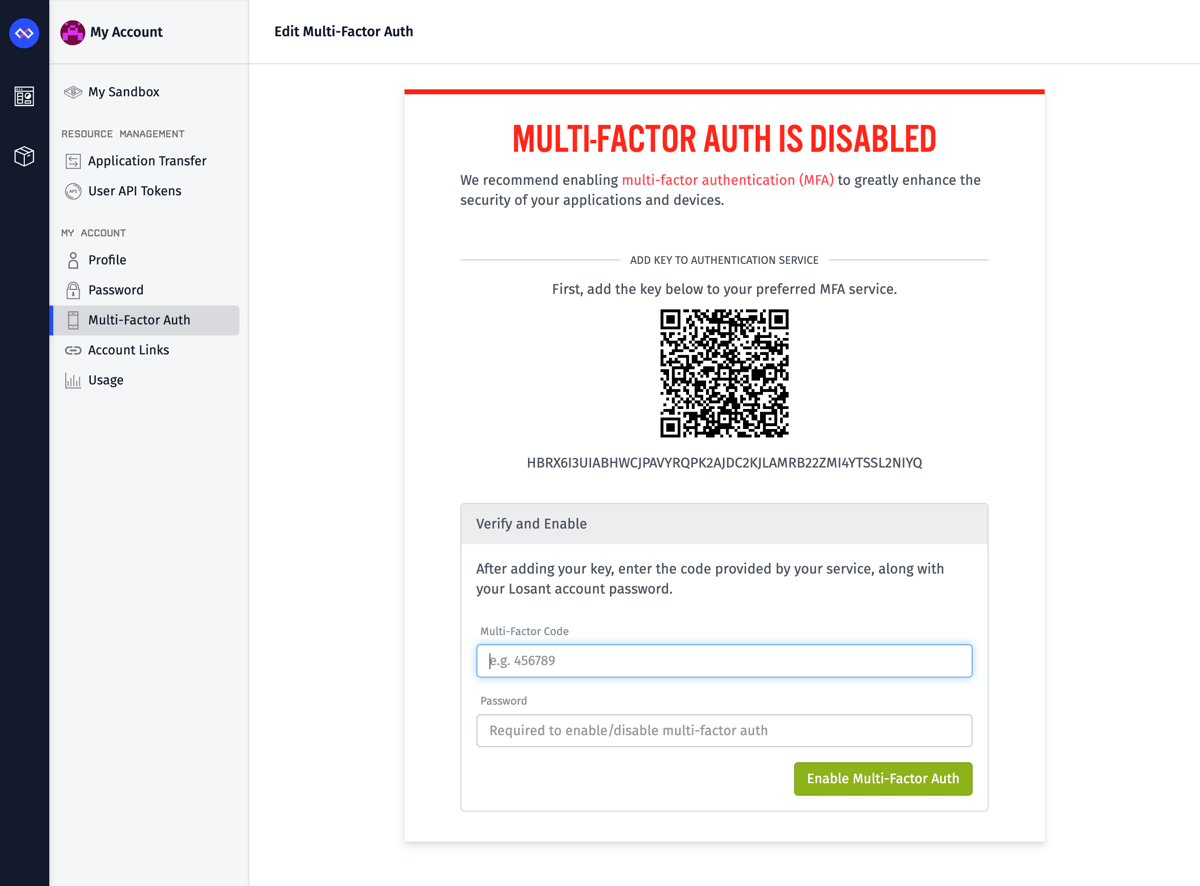
If the code expires before you click the button, you will have to enter the new code displayed within your app.
Signing In With Multi-Factor Authentication
To sign in using multi-factor authentication:
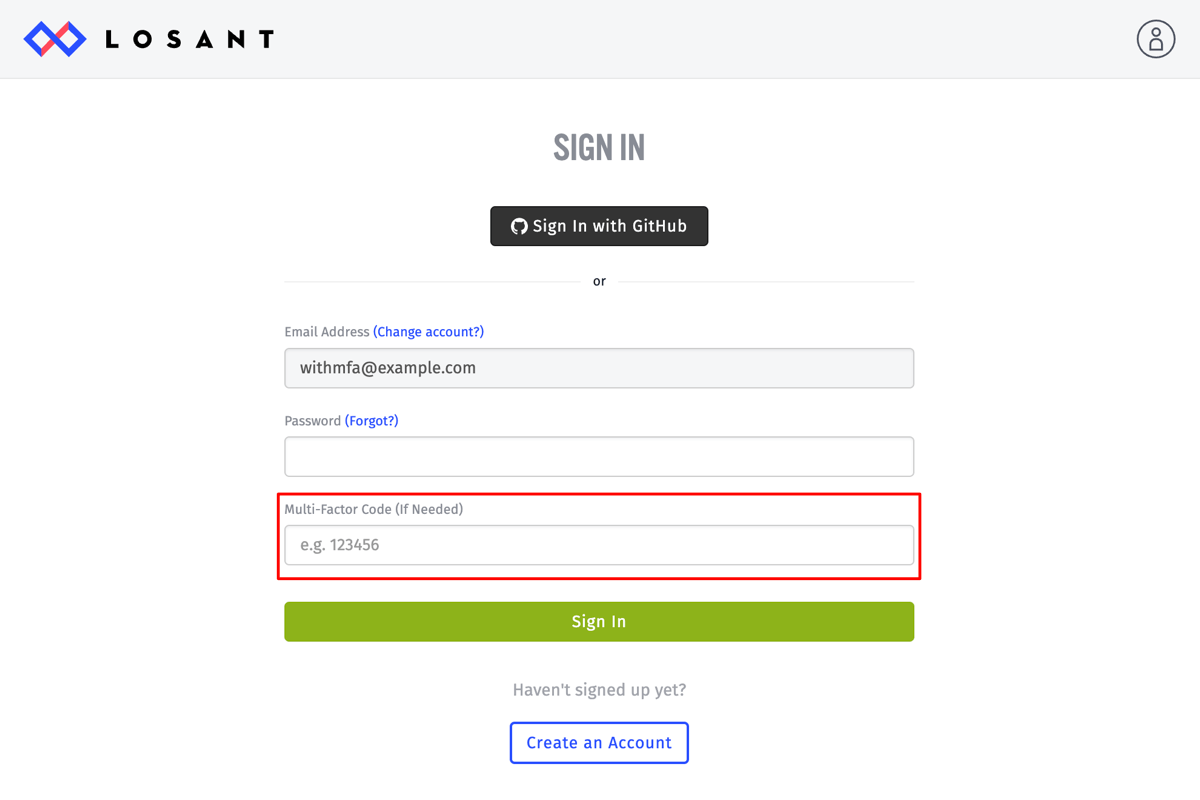
- Open your configured Authenticator App.
- Enter the generated one-time use code into the “Multi-Factor Code” field.
- Fill out the along with your “Email” and “Password”.
Disabling Multi-Factor Authentication
To disable multi-factor authentication:
- Navigate to the “Multi-Factor Auth” link within your account sub-navigation.
- Click “Disable Multi-Factor Auth.”
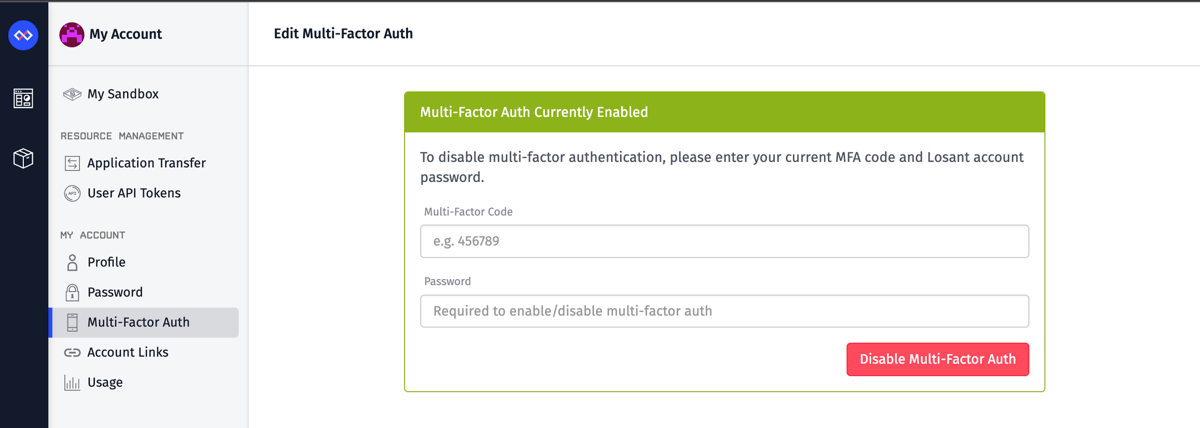
It is possible that, due to organization MFA requirements, you may not be allowed to disable MFA on your account. If so, this page will display a list of organizations whose requirements prevent disabling it. If you still wish to disable MFA, you must do one of the following …
- Leave the organizations.
- Downgrade your role in the organizations to a role that does not require MFA.
- Work with the organization administrators to change the MFA requirements for the organizations.
Signing In With GitHub
Some users prefer to sign in to their Losant accounts using their existing GitHub accounts – that is, utilizing GitHub as an OAuth provider. This link can be established one of two ways:
During Account Creation
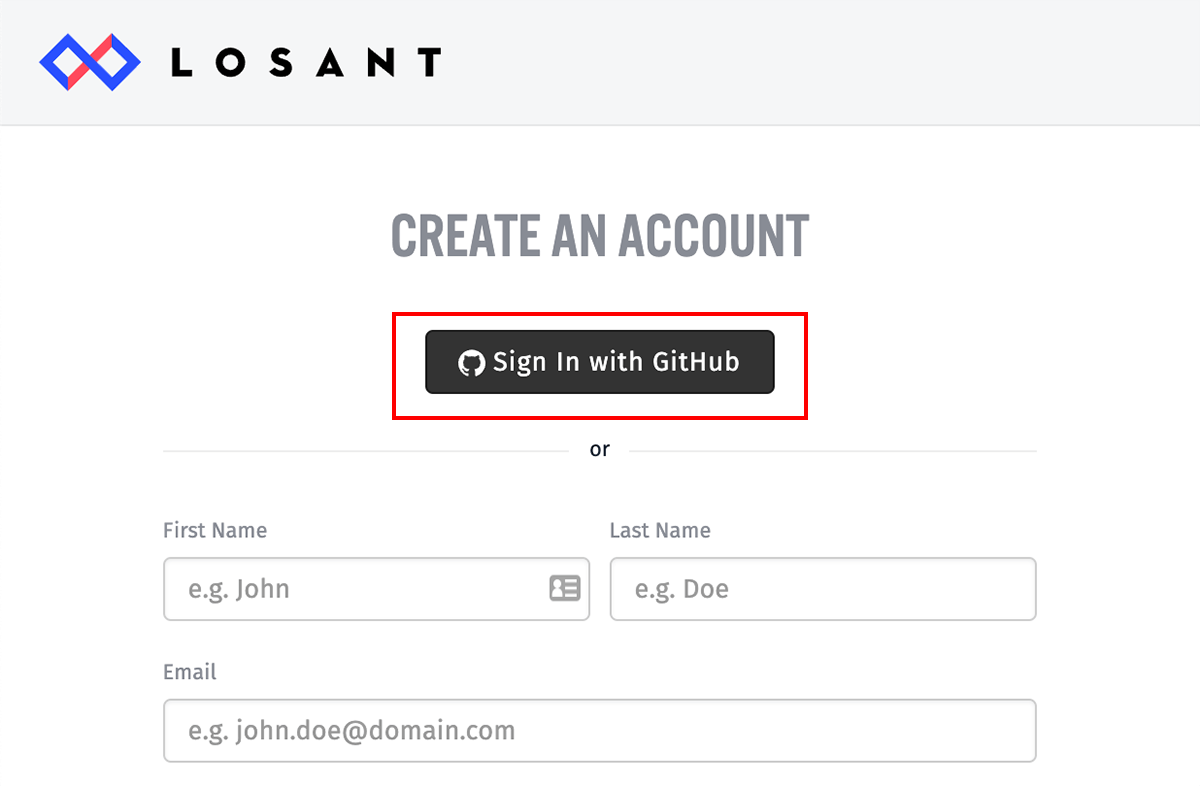
If you do not yet have a Losant account, you may click the “Sign In with GitHub” button at the top of the account creation screen. This will redirect you to a page managed by GitHub where you can sign in to your account and authorize Losant to view portions of your GitHub profile (such as your name and email address).
Once you authorize Losant’s access, you will be redirected back to the Losant account creation screen. Your GitHub profile information will be visible at the top of the screen, and portions of the account creation form will be filled in with data from your GitHub profile. You may change these values if you wish.
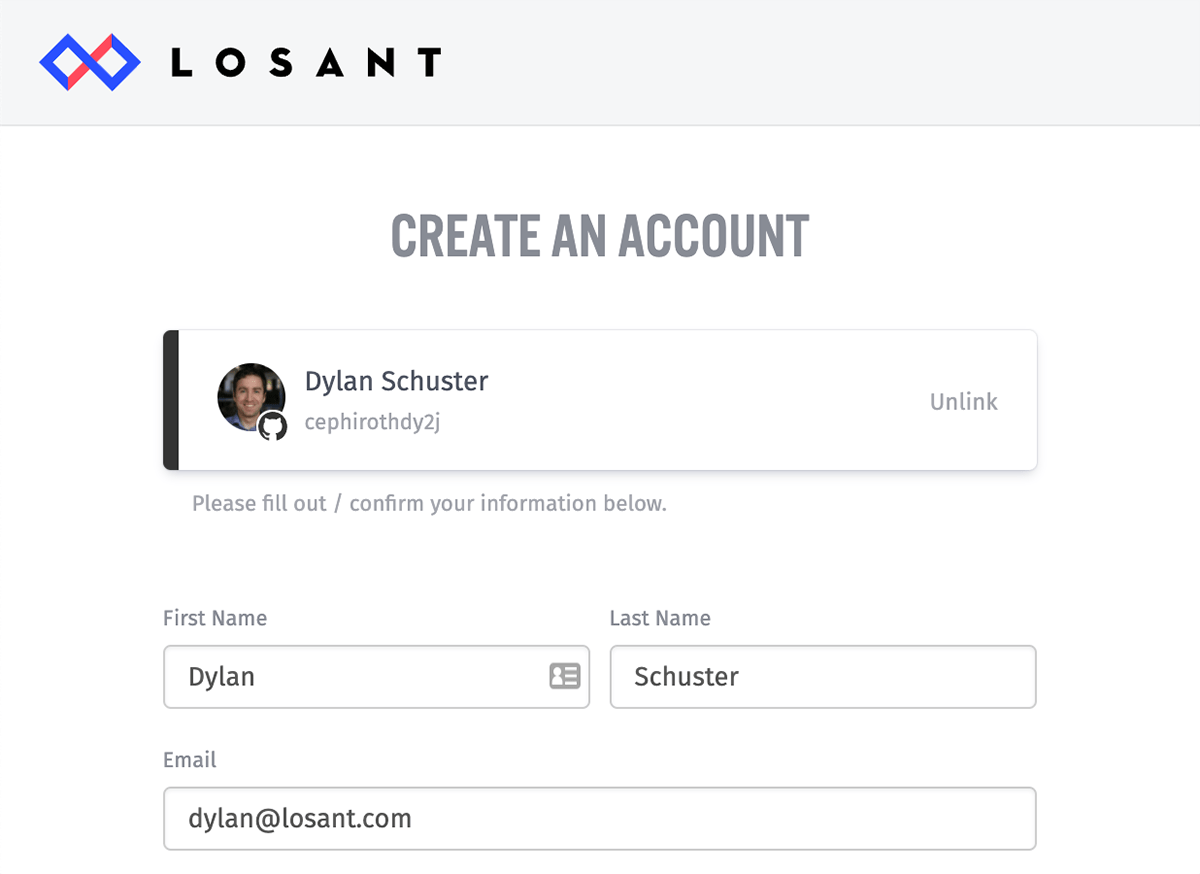
When utilizing GitHub while creating an account, the Losant account password field becomes optional – as in, signing in with GitHub does not require entering a password for Losant, just for your GitHub account. If you do set a Losant account password, you may use that password (in conjunction with your email address) to sign in to your Losant account, or you may use the GitHub login flow. Do not enter your GitHub password in this field; rather, the Losant password should be unique.
If you choose to not enter a Losant account password, you will only be able to sign in using the GitHub flow. If you revoke Losant’s access to your GitHub account, you will have to go through Losant’s password reset flow (requesting a tokenized link in your email and setting a new password) to regain access to your Losant account.
After Account Creation
You may also link a GitHub account to your Losant profile after it has been created by visiting the “Account Links” page in your Losant profile. There, you will see the option to connect GitHub to your Losant account.
Clicking this takes you to a GitHub-managed web page where you may sign in to your GitHub account and authorize Losant’s access to your profile.
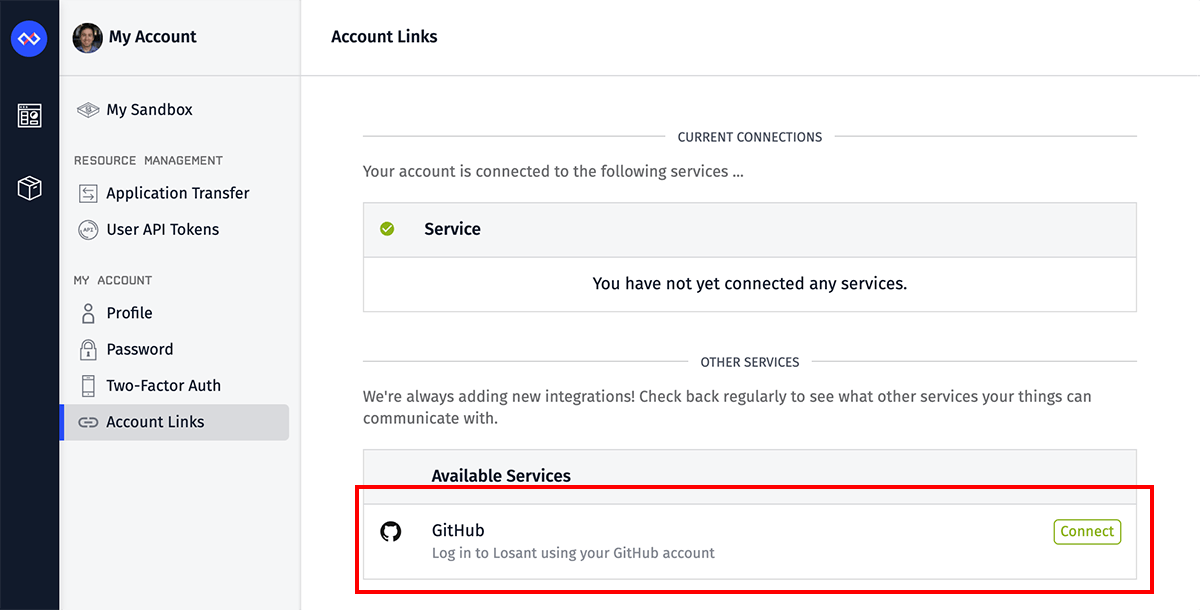
Once this is complete, you may sign in to your Losant account using your email address and previous Losant password, or by utilizing the “Sign In with GitHub” button on the account sign-in form.
Removing GitHub Link
If at any point you would like to revoke Losant’s access to your GitHub profile, you may do so one of two ways:
- In your Losant profile, click the “Disconnect” link tied to GitHub in the “Account Links” screen.
- Through GitHub, you may revoke access through your account’s Authorized OAuth Apps.
Signing In With Single Sign-On (SSO)
Some larger enterprises have worked with Losant to integrate with their custom single sign-on (SSO) provider. In these scenarios, when attempting to sign in using your company email address, you will instead be redirected to your company’s SSO interface, where you must enter the password for that email address (and potentially a multi-factor authentication code).
On successful login to that service, you will be redirected back to your Losant account as a signed-in user.
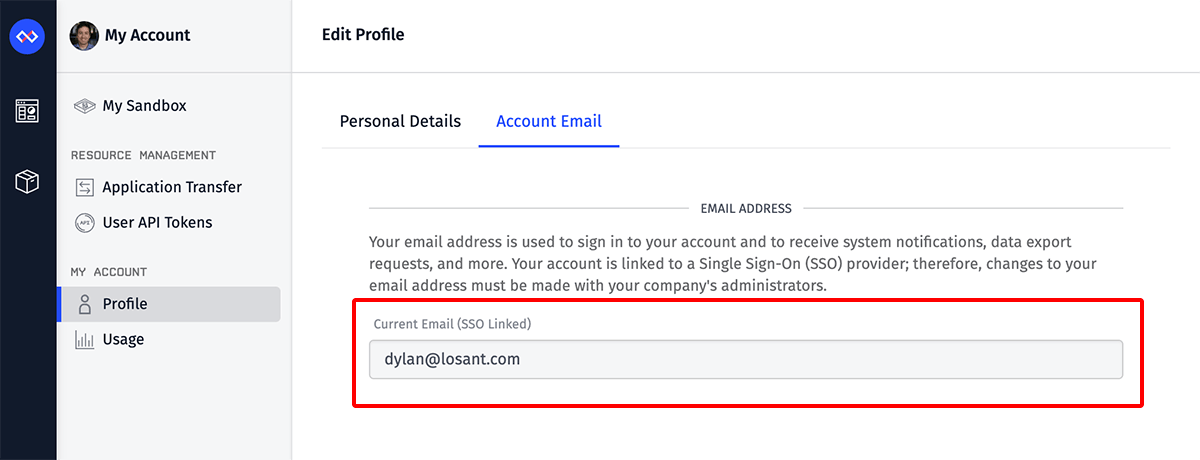
Note: When utilizing SSO, the following changes occur in your Losant account …
- You may not change your account’s email address.
- Your email address is automatically considered “verified”.
- You may not set a distinct password, nor enable multi-factor authentication for your Losant account. Instead, all authentication is managed through the SSO provider.
- You may not integrate your Losant account with your GitHub account.
- You may not delete your Losant account.
Editing Your Profile
The profile information you entered while creating your Losant account can be changed at any time under the “Personal Details” tab of the “Profile” page.
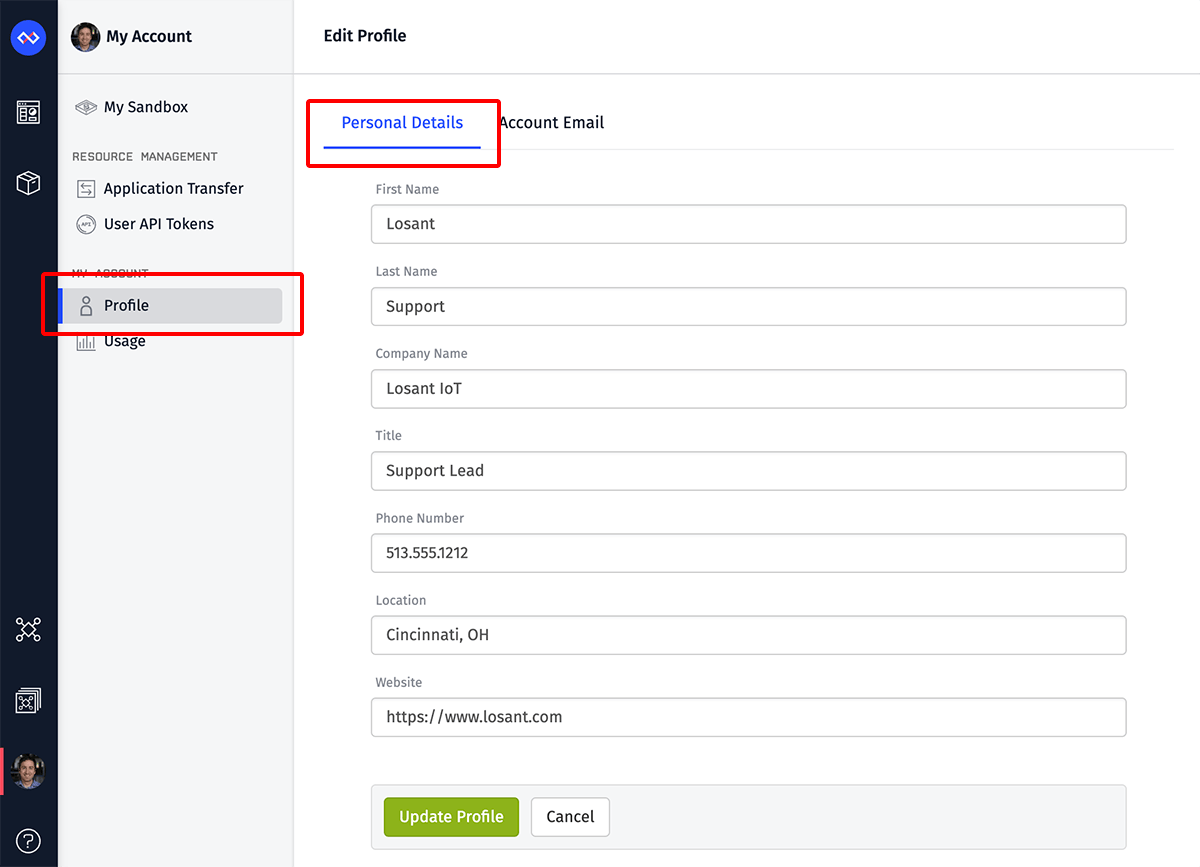
- The First Name and Last Name properties are exposed, along with your email address, to any organizations you are a member of. Only the First Name is required.
- The other profile fields are only exposed to Instance Manager members.
Changing Your Email Address
Your account’s email address is used for signing in to your account, as well as for delivering data export requests, system notifications, and more. For added security, changing your email address requires re-authenticating with your current account password and, if enabled, a multi-factor authentication code.
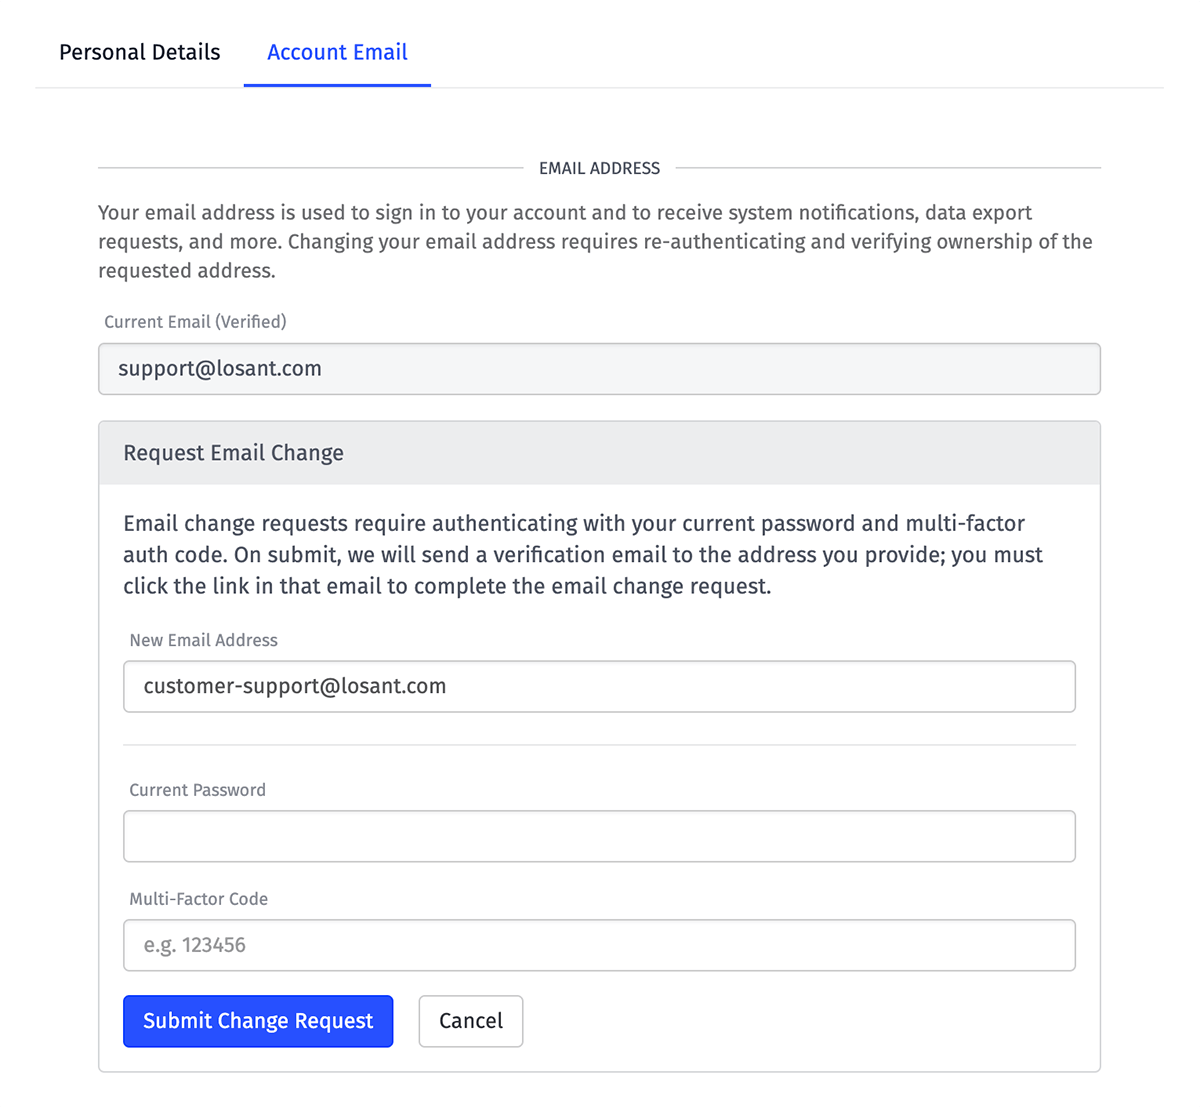
Additionally, you must verify ownership of the requested email address by clicking a verification link in an email that is sent to that address on submit of the request. Losant will continue to use the current email address (not the requested new address) until that verification step has been completed.
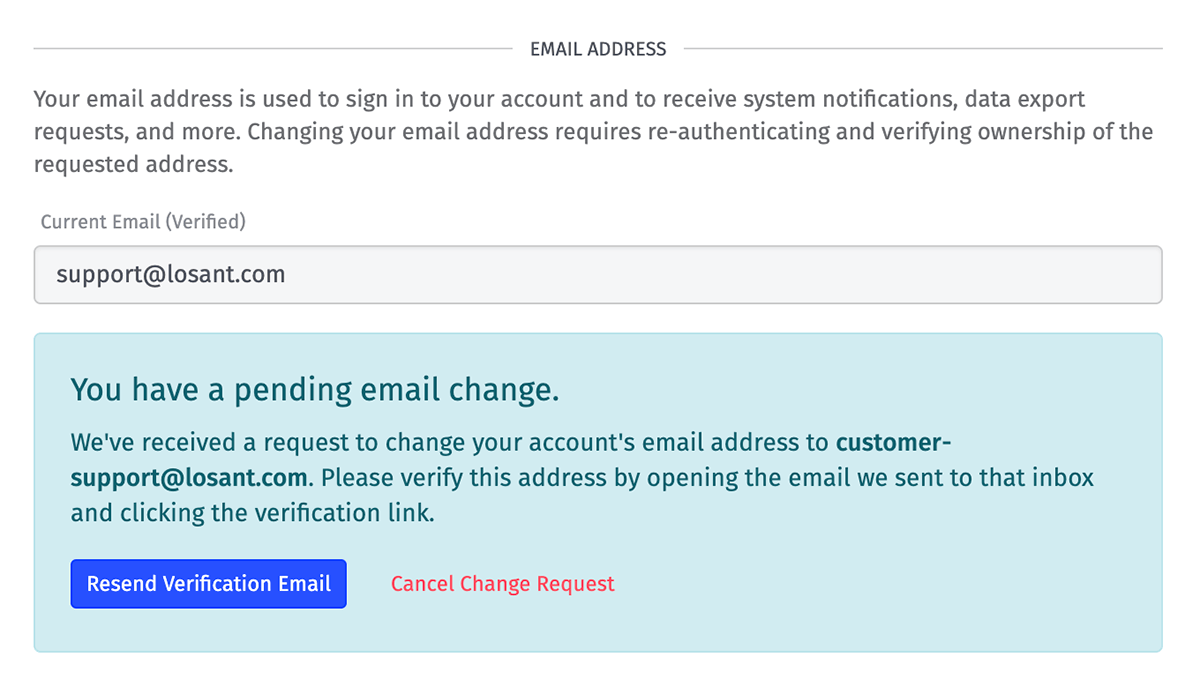
If necessary, you may request a new verification email be sent to the requested address at any time. You may also cancel the email change request if, for example, you decide to retain the current address or if you notice a typo in the previous request. Canceling the change request does not require re-authenticating.
As noted above, SSO-linked users cannot change their email address.
Changing Your Password
To change your account password, click the “Password” link in the account subnavigation. Changing your password requires entering your current account password and, if enabled, a multi-factor authentication code. (If you do not know your current account password, you will need to sign out and go through Losant’s “forgot password” flow.)

You must also enter your new account password, and then enter it a second time to confirm it has been entered correctly. The new password must meet the following criteria:
- Minimum of 12 characters
- At least one uppercase letter (
A-Z) - At least one lowercase letter (
a-z) - At least one number (
0-9) - At least one special character (
!@#$%^&*(), etc.)
As noted above, SSO-linked users cannot change their Losant account password since authentication is managed through the Single Sign-On provider.
Viewing Sandbox Usage
Click the “Usage” link in your account subnavigation to view the payload, notebook minute, and resource usage across all Sandbox-owned applications. The interface is similar to the organization usage page.
Note: Unlike organizations, sandbox users cannot exceed their monthly payload limits, and any payloads received after the limit is reached will be rejected.
Deleting Your Account
Note that deleting your Losant account will permanently and immediately delete all resources owned by your user account, including applications and dashboards. Organization-owned resources will not be affected.
As mentioned above, SSO-linked accounts cannot be deleted, as these accounts are managed by the issuing enterprise organization.
To permanently delete your account, navigate to your My Account page and click on Profile. On the bottom right, click the “Delete Account” button.
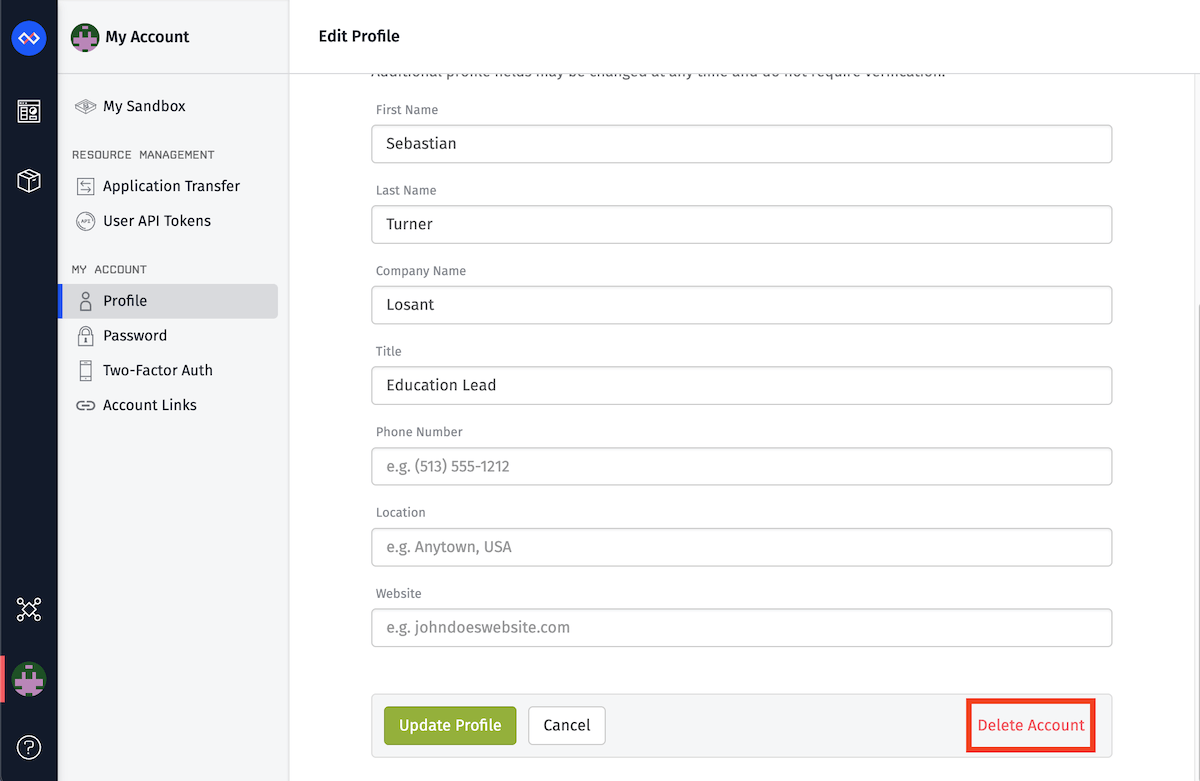
You will be asked to re-enter your credentials to confirm account deletion.
Was this page helpful?
Still looking for help? You can also search the Losant Forums or submit your question there.
